Saturday, December 15, 2012

Caramel Apple Cheesecake Bars


Salted Caramel Apple Cheesecake Bars


Ingredients
 
For the crust 
1/2 cup unsalted butter, room temperature
1 cup flour
1/4 cup brown sugar, packed
1/8 tsp salt
1/4 tsp cinnamon

For the cheesecake
1/4 cup sugar
8 oz reduced fat cream cheese, room temperature
1 large egg
1/2 tsp vanilla extract

For the apple filling
2 granny smith apples, cored and cut into bite-sized pieces
1 1/2 tbsp sugar
3/8 tsp cinnamon

For the streusel topping 
6 tbsp butter, room temperature
1/2 cup flour
1/2 cup quick oats
1/2 cup brown sugar
1/4 tsp ground cinnamon

For the caramel sauce  
1/2 cup packed brown sugar 
1/4 cup butter, cubed 
1/2 cup heavy whipping cream


Instructions
  1. For the crust, cut the butter into the flour, sugar, salt and cinnamon until combined and crumbly. Press the mixture into the bottom of an 8x8-inch pan that has been lined with aluminum foil.  Bake at 350 until lightly golden brown, 8-12 minutes.  Set aside and let cool.
  2. For the cheesecake, beat the sugar into the cream cheese until smooth.  Beat in the egg and vanilla.  Pour the mixture into the baking dish over the crust.
  3. For the apple filling, mix the apples, sugar, cinnamon and nutmeg together in a large bowl.  Sprinkle on top of the cheesecake in an even layer.
  4. For the streusel topping, cut the butter into the flour, oats, brown sugar, and cinnamon until combined and crumbly.  Sprinkle evenly over the apples.  Bake at 350 until the cheesecake is set, about 25-35 minutes. Let cool.  Refrigerate.
  5. For the caramel sauce, in a small saucepan, combine brown sugar and butter. Cook over medium heat until butter is melted. Gradually add cream. Bring to a slow boil over medium heat, stirring constantly. Remove from the heat.  Let cool and serve over the apple cheesecake bars.


These are delicious!!  They're more like a dessert than a bar; we all ate them with forks, with all that caramel sauce on the top:)  Next time I plan on trying to make them gluten free; I think it'll probably work out fine!

Have a wonderful day!

Thursday, December 13, 2012

A Christmas/Winter Ruffle Table Runner


My project I told you about that I'm finally sharing with you!!  I had it finished and took pictures, but then when I tried editing them before they wouldn't save; it worked now though so it's all good:)
 

I used a fun mitten print fabric; then I incorporated in the green and red to make it a little more Christmas-y.  I think we'll be able to use it all winter though!


Did you know it's kind of hard to gather fabric when you have 3 layers??  It is; I have experience now!!!  That's why it took longer than I thought it would to make it:)


I think it's cute though:)  It's sitting on the dining room table with some fun little candles in the center of it that we got from a bazaar!  I wish I would've made the table runner shorter, but it works good enough!

Hope you all had a wonderful day!  And have been having fun crafting & baking; getting ready for Christmas!  I need to get BUSY!!  :)

Tuesday, December 4, 2012

Baker's Review Wednesday: Pumpkin Cookies


Pumpkin Cookies

2 1/2 cups flour
1 teaspoon baking powder
1 teaspoon baking soda
2 teaspoons cinnamon
1/2 teaspoon ground nutmeg
1/2 teaspoon cloves
1/2 teaspoon salt
1/2 cup butter, softened
1 1/2 cups white sugar
1 cup canned pumpkin puree
1 egg
1 teaspoon vanilla extract

Icing:
1 cup powdered sugar
1 tablespoon milk
1 tablespoon melted butter
1 teaspoon vanilla

Preheat oven to 350 degrees F.  Combine flour, baking powder, baking soda, cinnamon, nutmeg, ground cloves, and salt; set aside.
In a medium bowl, cream together the 1/2 cup of butter and white sugar.  Add pumpkin, egg, and vanilla to butter mixture and beat until creamy.  Mix in dry ingredients.  Drop on cookie sheet by tablespoonfuls; flatten slightly.
Bake for 15 to 20 minutes in the preheated oven.  Once cookies are off pan, drizzle glaze on with fork.
To make glaze: Combine powdered sugar, milk, melted butter, and vanilla.  Add milk as needed to achieve drizzling consistency.

*******

The first time I made these delicious cookies was earlier this year in school.  I absolutely LOVED them, so I had to come home and make some, too!  They're soft, delicious yummy-ness!!  Super addicting!  Make them.  They're easy and delicious.  Two things I like when baking!!

Have a wonderful day, everyone!  I should be back soon with some projects I've been working on (Okay . . . well, the one I'm thinking about I started today, but I think I'll finish it tomorrow . . . so I should be back with it soon!!)
 

Friday, November 23, 2012

BLOG SALE!!!!!!!!

These are a few things I have left from our bazaar that I wanted to put on here to see if I could sell anything else:)  The pictures were snapshots .. literally!!  But here everything is . . .

Pearl Bud Headbands - $4.50 each (I love these and wear them ALL THE TIME!!  Especially my gray one:))
Dark Purple - SOLD, Bright Pink - SOLD, White, Mustardy-Yellow(on black) - SOLD, Purple - SOLD, Bright Pink, Mustardy-Yellow(on tan), Orange, Green

The pictures of headbands on me are just to show what it looks like and they're kinda faded out because they're mirror shots:)


Lace Flower Headbands - $3.50
White Lace w/ Black Button - SOLD and Black Lace w/ Purple Button - SOLD


Button Headbands - $5.75 each (Another one of my favorites; they're so versatile and can go with pretty much anything w/ there many colors!)
Many colored version (the 4 on the left) or neutral versions (the 2 on the right)

Wearing the neutral version button headband.

Wearing the many-colored version button headband.

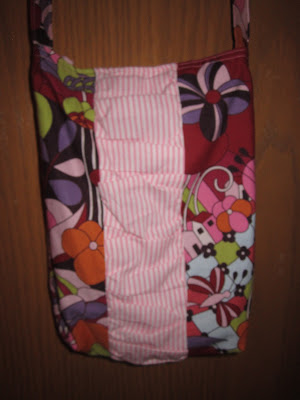
The Ruched Bag - $23.50  (Seriously, my favorite bag EVER!  Like you know I made a new bag for school .. I still find myself using my bag like this half the time!)
An olive-green color - Has 4 Interior Pockets

Pink Stripe Ruched Bag - $12  (Perfect for your little girl!)

The Copy-Cat Bag - $15 - SOLD
Purple & White Floral Print w/ White Ruffle & Flower - Has 2 Interior pockets

 Bible Verse Plaque - $15
Can either hang on the wall with the hook or can be set on an easel to rest on a table top

 Cards - $1.75 each
Happy Birthday! and Thinking of You Cards

Thank You Cards

Baby Cards

Cream & White Ruffle Table Runner - $26.50
A beautiful table runner!  The back is a cream print fabric and it has a layer of batting in it.
 

Hope everyone has had a wonderful fall!  And now it's time to start getting ready for Christmas!  What FUN!!  Hope everyone has a lovely day!

Please comment and let me know if you wish to purchase anything!  Also, please ask any questions you have; I'm happy to answer them!  Like if you want measurements or whatever . . . . 


Wednesday, October 3, 2012

Baker's Review Wednesday: Pumpkin Donut Muffins

Pumpkin Donut Muffins
For the batter:
10 TBSP (1 1/4 sticks) butter, softened
3 c. all-purpose flour
2 1/2 tsp. baking powder
1/4 tsp. baking soda
1 tsp. coarse salt
1 1/2 tsp. cinnamon
1/2 tsp. ground nutmeg
1/4 tsp. ground allspice
1/3 c. buttermilk (I used "homemade")
1 1/4 c. pure pumpkin purée
3/4 c.brown sugar 
2 eggs
For the cinnamon-sugar topping:
3/4 c. granulated sugar
2 1/2 tsp. ground cinnamon
1/4 c. butter, melted
Directions:
1.  Preheat oven to 350 degrees F. Line or butter and flour 18-24 wells in standard-sized muffin cups. 
2.  To make the batter, whisk together flour, baking powder, baking soda, salt, cinnamon, nutmeg, and allspice in a medium bowl.  In a separate small bowl, whisk together buttermilk and pumpkin.
3.  Cream butter and brown sugar in a bowl. Beat in eggs, one at a time, scraping down sides of bowl as needed.  Turn the mixer speed to low and add flour mixture in three additions, alternating with pumpkin mixture.  Beat to combine.
4.  Fill muffin tins.  Bake 18-22 minutes or until a toothpick inserted in center of a muffin comes out clean. 
5.   Meanwhile, make the topping by combining cinnamon and sugar in a medium bowl.  Let muffins cool 10 minutes in pan on a wire rack.  One at a time, remove muffin from pan and brush the top with butter.  Dip in cinnamon-sugar mixture.  Let muffins cool completely on a wire rack.  Keep in an airtight container at room temperature up to 3 days.
{recipe slightly adapted from here}

These are very delicious!  They're not too pumpkin-y and they're just yummy-ness.  They're so fall-ish, too, so it's a wonderful time to make them.  I'll definitely be making these again!  They're kind of addicting . . . oh . . . maybe I shouldn't make them again!!

Did you make some wonderful new (or old) recipe this week?

Have a wonderful day!

Wednesday, September 26, 2012

Baker's Review Wednesday: Cinnamon Sugar Breadsticks w/ Cream Cheese Drizzle


Cinnamon Sugar Breadsticks w/ Cream Cheese Drizzle

2 1/4 tsp yeast
1/4 C sugar, divided
1 C warm water, divided
1 1/2 Tbsp oil
1 egg
1 /2 tsp salt
2 1/4 C flour
1/4 C butter, melted
Cinnamon Sugar mixture:  6 Tbsp sugar mixed with 1 tsp cinnamon

In mixer dissolve yeast, 1/2 Tbsp sugar and 1/2 C warm water.  Allow yeast to proof.  Add in oil, egg salt, 1 1/2 C flour and remaining sugar and water.  Mix until smooth.  Stir in remaining flour to form a soft dough.   Knead until smooth and elastic.  Place into a greased bowl and cover.  Let rise in a warm place for about 40 minutes or until doubled.

Punch down the dough and put onto floured counter.  Roll into a 8 x 14 rectangle.  Using your pizza cutter cut into about 10 pieces.  Roll each strip like a snake.  Then hang the dough over your finger in the middle and twist the two ends together.  Place on a greased cookie sheet and allow to rise for another 20 minutes or until doubled.

Preheat oven to 400 and bake for 10 minutes or until golden brown.  Brush with melted butter and sprinkle with cinnamon sugar.  Drizzle with cream cheese glaze (see below)

Cream Cheese Drizzle:
4 ounces cream cheese
1 1/4 C powdered sugar
1 - 2 Tbsp whipping cream
1 tsp vanilla

Soften cream cheese and mix everything together.  Beat until a good consistency for drizzling.  Place in a ziploc bag and snip off the corner.  Drizzle over warm breadsticks.

(note: I made a double batch of breadsticks, so I also made a double batch of the cream cheese drizzle.  I think I probably had about 1/2 of the drizzle left.)


Yummy!  Delicious!  Oh, my, it was nummy, addicting-ness!!  Nice and fresh and warm and fluffy!  They were so good!  I would 101% recommend you try them!


Now that was fresh . . . the next morning, they weren't nearly as good.  If you warmed them up in the microwave for about 10 seconds, they were pretty good . . .but not NEARLY as good as fresh.  So go ahead.  Make them.  And eat them fresh.  All of them.  Because you may as well use all those calories on them when they're the best!!


Have a wonderful day!

Tuesday, September 25, 2012

A Mini Album {Birthday Gift}

 This is a mini album I made for my cousin & best friend, Pamela, for her birthday.  It was a last minute thing - I saw my inspiration for it Friday, made it Saturday, and gave it to her Sunday, her birthday.

Wheww . . it was a relief when I finally got it done Saturday evening!


On the front I did a little pocket thing where I put some quotes I really liked in it.  All the pictures I just printed off at home, so they weren't very high quality, but they worked out okay:)

the front cover

the first page - explaining the book & a little note to Pamela

the second page - as you can see, these photo's are from our shopping trip

the third page

the fourth page

the fifth page

the 6th page (I wished I hadn't cut out the picture  .. . oh, well)

the 7th page

the 8th page

the 9th page

the 10th page

the 11th page

the 12th page

the 13th page

the 14th page

and the back cover:)

You may have noticed, but I used a set of double sided paper on this from a 6"x6" paper pad.

Hope you enjoyed:)